

Our Blog
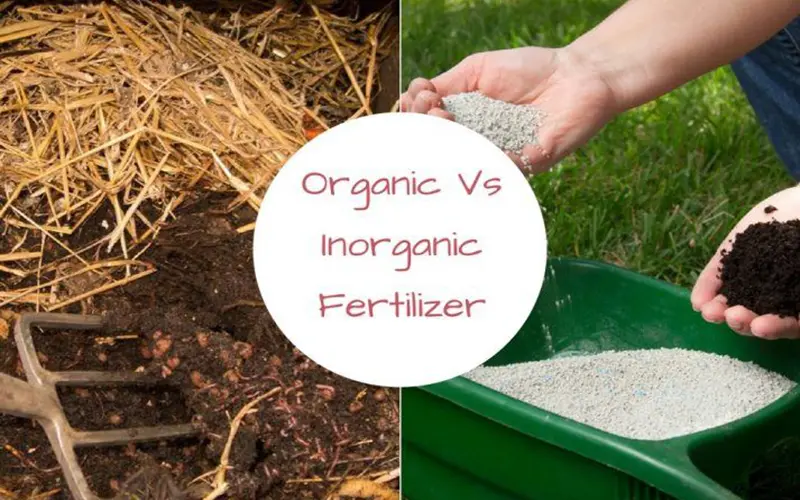
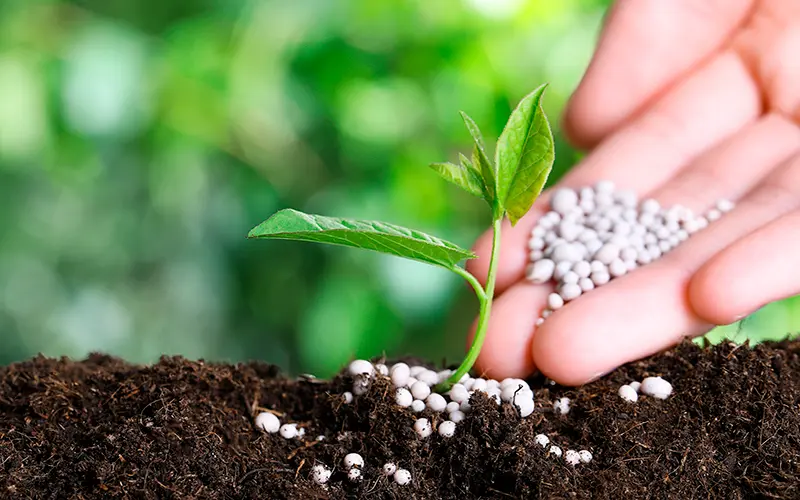
When it comes to nourishing plants and boosting crop yields, farmers and gardeners often face a key decision: Organic vs. Chemical Fertilizers.
Both types of fertilizers provide essential nutrients, but they do so in different ways, with varying effects on the soil, environment, and long-term crop health. Understanding the pros and cons of each helps you make informed choices based on your farming goals and values.
What Are Organic Fertilizers?
Organic fertilizers are derived from natural sources such as compost, manure, bone meal, and plant residues. They improve soil structure and add organic matter while slowly releasing nutrients. In the debate of Organic vs. Chemical Fertilizers, organic options are often praised for their environmental benefits and soil-enhancing properties.
Pros:
- Improve soil health over time
- Safer for the environment and beneficial soil organisms
- Lower risk of over-fertilization or plant burn
Cons:
- Slower nutrient release
- May require more volume to achieve the same results
- Nutrient content can vary between batches
Recommended Products: CK NPK Complex Fertilizers
What Are Chemical Fertilizers?
Chemical (or synthetic) fertilizers are manufactured using industrial processes. They contain concentrated amounts of essential nutrients like nitrogen (N), phosphorus (P), and potassium (K) in precise ratios. In comparing Organic vs. Chemical Fertilizers, chemical products offer speed and consistency.
Pros:
- Fast-acting and highly effective
- Easy to measure and apply
- Readily available in various formulations
Cons:
- Can degrade soil quality with long-term use
- Higher risk of runoff and environmental pollution
- May harm soil microbes and structure
Impact on Soil and Environment
A major factor in the Organic vs. Chemical Fertilizers discussion is the long-term impact on soil and ecosystems. Organic fertilizers enhance biodiversity and improve water retention, while chemical fertilizers can lead to salt buildup and nutrient leaching if misused. Choosing the right fertilizer depends not only on short-term yield goals but also on the long-term health of your land.
Recommended Products: Unique Fertilizers
Cost and Availability
From a cost perspective, chemical fertilizers may seem more economical due to their potency and widespread availability. However, when evaluating Organic vs. Chemical Fertilizers, it’s important to consider hidden costs such as environmental cleanup and reduced soil fertility. Organic fertilizers may cost more upfront but can reduce the need for soil amendments over time.
Which Should You Choose?
The right choice between Organic vs. Chemical Fertilizers depends on your specific needs:
- Use organic fertilizers if you prioritize sustainability, soil health, and long-term productivity.
- Use chemical fertilizers if you need fast results or precise control over nutrient delivery—especially for commercial-scale operations.
Many modern farmers adopt a blended approach, combining the strengths of both systems.
Nutrient Availability and Absorption
In the Organic vs. Chemical Fertilizers comparison, nutrient availability is a major factor. Chemical fertilizers offer immediate nutrient release, making them ideal for quick plant growth. Organic fertilizers, on the other hand, release nutrients slowly, which supports long-term soil fertility but may not meet urgent crop demands. Balancing quick needs with sustained health is key.
Storage and Shelf Life
Chemical fertilizers have a longer shelf life and are easier to store due to their dry, uniform composition. In contrast, organic fertilizers like compost or manure may decompose over time, attract pests, or require more space. These practical considerations influence the choice in the Organic vs. Chemical Fertilizers decision, especially for small or resource-limited farms.
Regulatory and Certification Impact
For farmers pursuing organic certification, using chemical fertilizers is not allowed. This makes Organic vs. Chemical Fertilizers not just a technical decision, but a legal one. Organic fertilizers align with organic farming standards and eco-labeling, which can also increase the market value of crops in certain markets.
For further reading, check out:
Conclusion
The debate between Organic vs. Chemical Fertilizers isn’t about choosing a winner—it’s about understanding the trade-offs. Each has clear advantages and limitations. By assessing your crop type, soil condition, and environmental goals, you can select a fertilization strategy that aligns with both your productivity targets and your values.
FAQs
1. Which is better for long-term soil health: organic or chemical fertilizer?
Organic fertilizers are better for long-term soil health because they improve soil structure, increase microbial activity, and add organic matter.
2. Can I use both organic and chemical fertilizers together?
Yes. Many farmers use a combined approach to get the fast results of chemical fertilizers and the soil benefits of organic ones.
3. Do organic fertilizers work as quickly as chemical fertilizers?
No. Organic fertilizers release nutrients slowly over time, while chemical fertilizers act faster but may not improve soil in the long run.
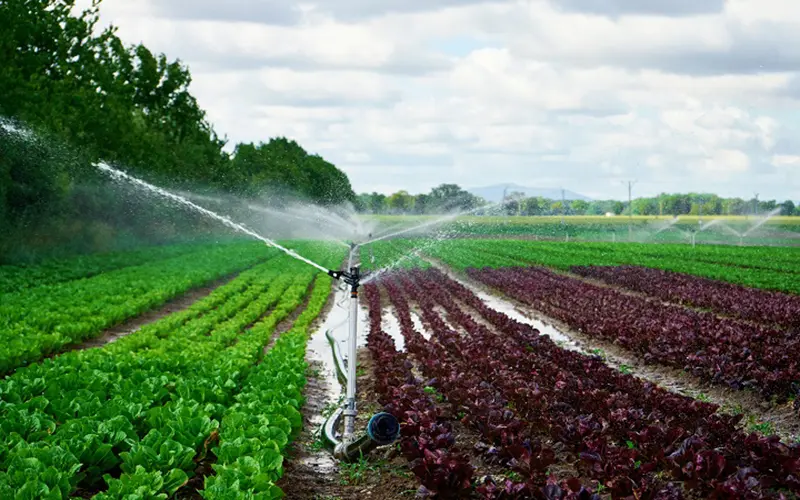
Modern agriculture demands smarter, more efficient methods to grow food while conserving resources. One such approach is combining Drip Irrigation and Fertilizer, often referred to as fertigation. This powerful duo allows farmers to deliver both water and nutrients directly to the plant roots, reducing waste and improving crop performance.
What Is Drip Irrigation and Fertilizer?
Drip Irrigation and Fertilizer systems use tubing to slowly release water mixed with dissolved nutrients near the plant’s root zone. This method ensures that crops receive consistent hydration and the exact amount of nutrients needed at various stages of growth, leading to healthier plants and higher yields.
Key Benefits of Drip Irrigation and Fertilizer
Efficient Water Use
Water is delivered only where needed, minimizing evaporation and runoff.
Recommended Products: CK NPK Complex Fertilizers
Targeted Nutrient Delivery
Nutrients reach the root zone directly, reducing losses to leaching or volatilization.
Improved Crop Yield and Quality
Steady feeding promotes stronger growth and better fruit or grain quality.
Environmental Sustainability
By reducing excess fertilizer use, this system helps prevent pollution of nearby water sources.
Choosing the Right Fertilizers
When using Drip Irrigation and Fertilizer systems, it’s essential to select water-soluble fertilizers that won’t clog the drip lines. Commonly used nutrients include nitrogen, phosphorus, potassium, and trace elements like zinc and iron. Compatibility with your water quality and crop type is also critical.
Recommended Products: Unique Fertilizers
Important Tips for Effective Use
- Use filters to prevent clogging from particles or undissolved fertilizer.
- Conduct regular system checks to monitor pressure and flow consistency.
- Adjust fertigation schedules based on crop stage, weather, and soil testing results.
These steps ensure that your Drip Irrigation and Fertilizer setup remains reliable and effective throughout the growing season.
Is Drip Fertigation Right for You?
Drip Irrigation and Fertilizer systems are ideal for high-value crops, orchards, vineyards, and vegetable farms. While initial installation may cost more than traditional systems, the long-term savings in water, labor, and fertilizer make it a wise investment for many growers.
Integration with Automation Systems
Modern Drip Irrigation and Fertilizer systems can be fully automated using timers, sensors, and nutrient controllers. These technologies help farmers schedule precise watering and feeding times, reducing human error and saving labor. Automation also allows for remote monitoring, making it easier to manage large fields with minimal effort.
Suitability for Different Soil Types
Drip Irrigation and Fertilizer systems are effective across a wide range of soil conditions. In sandy soils, the slow application prevents nutrients from leaching away, while in clay soils, it avoids waterlogging. Customizing emitter spacing and flow rates based on soil type ensures maximum efficiency.
Challenges and Maintenance Considerations
Despite their benefits, Drip Irrigation and Fertilizer systems require regular maintenance. Clogging, algae buildup, and uneven nutrient distribution can occur if filters aren’t cleaned or water quality is poor. Routine flushing of the lines and water testing help maintain performance and extend system lifespan.
For further reading, check out:
Conclusion
Combining Drip Irrigation and Fertilizer is a smart, sustainable strategy for modern agriculture. It increases nutrient use efficiency, reduces waste, and supports healthier, more productive plants. As climate challenges grow and resources become scarcer, this farming combo is no longer optional—it’s essential.
FAQs
1. Can all types of fertilizers be used in drip irrigation systems?
No. Only water-soluble fertilizers should be used to prevent clogging and ensure even distribution through the drip lines.
2. How often should I fertilize using a drip system?
Fertilizer frequency depends on the crop, soil condition, and growth stage. Many farmers use small doses weekly or bi-weekly for consistent nutrient supply.
3. Is drip fertigation cost-effective for small farms?
Yes. While the initial setup cost can be higher, drip fertigation reduces water, labor, and fertilizer use—leading to long-term savings even for small farms.

Fertilizer Burn is a common yet preventable issue that occurs when plants are exposed to excessive fertilizer, particularly those high in nitrogen or salts. This condition can damage or kill roots and foliage, leading to reduced growth, yellowing, or even plant death. Understanding how Fertilizer Burn happens and how to avoid it is essential for maintaining healthy, productive crops and gardens.
What Causes Fertilizer Burn?
Fertilizer Burn happens when too much fertilizer is applied or when it is applied incorrectly. High concentrations of nutrients—especially nitrogen—create a high salt index around the roots, drawing moisture out of plant tissues through a process called reverse osmosis. This dehydrates the plant and damages cell walls, resulting in scorched or dried-out leaves.
Symptoms of Fertilizer Burn
- Leaf edges turning brown or crispy
- Yellowing (chlorosis) between leaf veins
- Stunted growth or sudden wilting
- Salt crust on the soil surface
These symptoms usually appear within days of over-application, especially after dry conditions or poor watering practices.
Recommended Products: CK NPK Complex Fertilizers
How to Prevent Fertilizer Burn
Follow Label Instructions
Always apply fertilizer according to package directions. Over-application is one of the leading causes of Fertilizer Burn.
Water Before and After Application
Moist soil reduces the risk of salt buildup, and watering after fertilizing helps distribute nutrients more evenly and dilute concentrations.
Use Slow-Release Fertilizers
These release nutrients gradually, lowering the risk of overwhelming the plant with salts all at once.
Avoid Fertilizing During Heat or Drought
Plants are more susceptible to Fertilizer Burn when they’re already stressed. Apply during cooler periods with adequate soil moisture.
Treating Fertilizer Burn
If you suspect Fertilizer Burn, act quickly:
- Flush the soil with large amounts of water to leach out excess nutrients.
- Remove visibly damaged leaves if they are severely affected.
- Pause all fertilizer applications until the plant shows signs of recovery.
Recovery depends on the severity of the burn and the plant’s resilience. Some plants may bounce back in a week, while others may suffer permanent damage.
Recommended Products: Unique Fertilizers
Fertilizer Selection Tips
Choosing the right fertilizer can greatly reduce the risk of Fertilizer Burn:
- Opt for balanced or lower-salt formulations
- Use organic fertilizers like compost, which are less concentrated
- Monitor nutrient needs with regular soil testing
Importance of Soil Testing Before Fertilization
Conducting a soil test helps determine the exact nutrient needs of your plants and prevents unnecessary fertilization. By knowing what’s already present in the soil, you can avoid over-application, one of the primary causes of Fertilizer Burn. Soil testing also helps you choose the right type and amount of fertilizer.
Differences Between Organic and Synthetic Fertilizers
Organic fertilizers like compost or manure release nutrients slowly and pose a lower risk of Fertilizer Burn. In contrast, synthetic fertilizers are more concentrated and fast-acting, increasing the chance of salt buildup if overused. Understanding these differences helps tailor safe and effective fertilization practices.
Signs of Recovery After Fertilizer Burn
Once you’ve flushed the soil and paused fertilization, look for signs of new green growth, firm leaves, and steady improvement in plant color. Recovery time varies, but gradual regrowth indicates your plant is overcoming Fertilizer Burn and absorbing nutrients more effectively.
For further reading, check out:
Conclusion
Fertilizer Burn is a preventable condition that results from overfeeding plants or improper application methods. By understanding the signs, using fertilizers wisely, and sticking to best practices, you can keep your plants healthy and thriving without the risks of nutrient overload.
FAQs
1. How long does it take for plants to recover from Fertilizer Burn?
Recovery can take anywhere from a few days to a few weeks, depending on the severity of the burn and the plant type.
2. Can I reuse soil that caused Fertilizer Burn?
Yes, but flush it thoroughly with water to remove excess salts before planting again or reapplying fertilizer.
3. Is it better to under-fertilize than risk Fertilizer Burn?
Yes. Slight under-fertilization is safer and can be corrected more easily than over-fertilization, which can damage or kill plants.
Choosing between Foliar vs. Root Application can significantly impact nutrient uptake, crop health, and overall yields. Both methods have distinct advantages and limitations, and understanding their differences helps growers tailor fertilization strategies for optimal results.
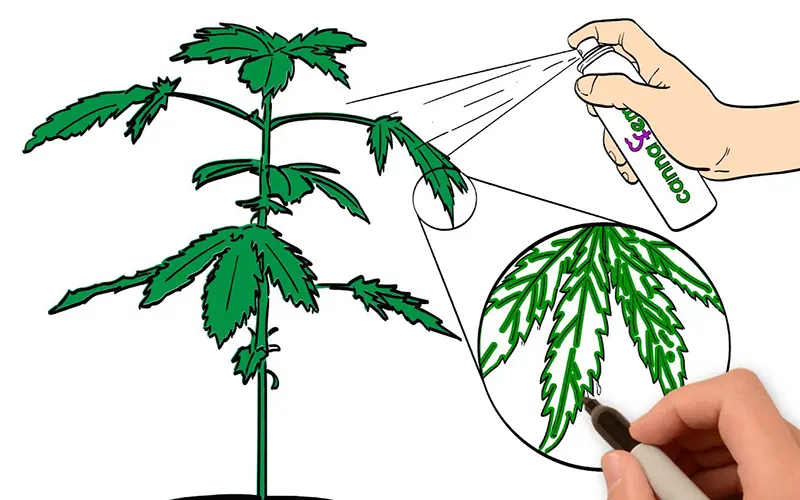
What Is Foliar Application?
Foliar application involves spraying dissolved nutrients directly onto plant leaves. This method allows for rapid absorption through stomata and cuticle, bypassing soil interactions. Key benefits include:
- Quick correction of visible deficiencies
- Targeted feeding during critical growth stages
- Reduced nutrient losses from leaching or fixation in soil
However, foliar sprays may cause leaf burn if concentrations are too high, and coverage must be uniform for best results.
What Is Root Application?
Root application delivers nutrients through soil, either via granular fertilizer, fertigation, or soil drenching. Its advantages are:
- Sustained nutrient release feeding plants over longer periods
- Enhanced root development as roots explore nutrient-rich zones
- Lower risk of phytotoxicity compared to high-concentration foliar sprays
On the downside, root-applied nutrients can become immobilized by soil pH or microbial activity, and uptake may be slower during cool or dry conditions.
Comparing Foliar vs. Root Application Efficiency
When evaluating Foliar vs. Root Application, consider the nutrient type and crop stage. Micronutrients and quickly needed elements (like calcium or boron) often respond best to foliar feeding. Macronutrients (nitrogen, phosphorus, potassium) typically require larger quantities, making root application more practical and cost‑effective.
Factors Influencing Effectiveness
Environmental Conditions:
High humidity and mild temperatures favor foliar uptake, while well‑moistened soils improve root absorption.
Crop Species:
Some crops have waxy leaves that hinder foliar absorption, tipping the balance toward root feeding.
Soil Health:
In soils prone to nutrient fixation or leaching, Foliar vs. Root Application decisions hinge on maintaining consistent nutrient availability.
Recommended Products: CK NPK Complex Fertilizers
Best Practices for Combined Use
Integrating both methods often yields the best outcomes:
Root application at planting to establish a nutrient baseline.
Foliar sprays during bloom or stress periods for a nutrient boost.
Soil tests and tissue analysis to fine‑tune timing and concentrations for each method.
Cost and Economic Considerations
When choosing between Foliar vs. Root Application, factor in the costs of materials, equipment, and labor. Foliar sprays may require specialized nozzles and more frequent applications, increasing operational expenses. Root applications often involve bulk fertilizers and existing irrigation systems, which can be more cost‑efficient for macronutrient delivery over large areas.
Recommended Products: Unique Fertilizers
Equipment and Labor Requirements
Foliar feeding demands precise spray equipment, regular calibration, and skilled operators to ensure even coverage and avoid phytotoxicity. Root application can leverage standard spreaders or fertigation lines, reducing the need for constant monitoring. Balancing labor inputs for both methods helps optimize your overall fertilization program.
Environmental and Sustainability Impacts
Overuse of foliar sprays can lead to off‑target drift and potential non‑point pollution, while excessive root‑applied nutrients may leach into groundwater. Integrating Foliar vs. Root Application strategies with buffer zones, split applications, and soil health practices minimizes environmental risks and promotes a more sustainable nutrient management system.
For further reading, check out:
Conclusion
Ultimately, the choice between Foliar vs. Root Application depends on crop needs, environmental factors, and production goals. By leveraging the rapid response of foliar feeding alongside the stability of root application, growers can ensure balanced nutrition, healthier plants, and maximized yields.
FAQs
1. When should I choose foliar over root application?
Use foliar sprays for quick correction of micronutrient deficiencies or during stress periods when root uptake is limited.
2. Can foliar application replace all root feeding?
No. Foliar feeding is best for small, targeted doses—macronutrients still require root applications for sustained supply.
3. Is timing important for foliar sprays?
Yes. Apply during cooler, humid parts of the day (early morning or late afternoon) to maximize leaf absorption and minimize burn.
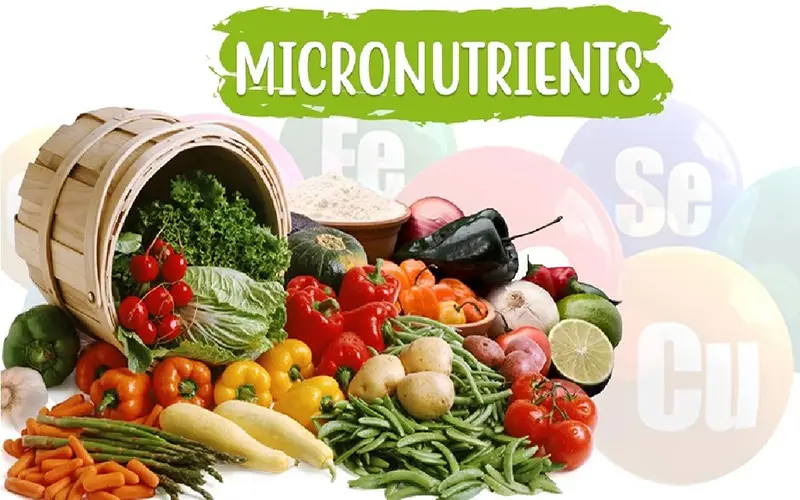
Micronutrients in Agriculture play a critical role in crop health and yield, despite being needed in much smaller amounts than primary nutrients like nitrogen, phosphorus, and potassium.
These elements—such as zinc, iron, manganese, copper, boron, molybdenum, and chlorine—are essential for plant metabolism, enzyme function, and stress tolerance. Understanding the importance of Micronutrients in Agriculture can help farmers optimize fertilizer programs and achieve more robust, nutritious harvests.
The Role of Micronutrients in Plant Growth
Although required in trace quantities, Micronutrients in Agriculture are vital catalysts in biochemical processes. For example, iron is a key component of chlorophyll synthesis, while zinc activates enzymes involved in protein production and growth regulation.
Without adequate micronutrients, plants develop deficiencies that manifest as chlorosis, stunted growth, or poor fruit set.
Common Micronutrient Deficiencies and Symptoms
Recognizing deficiency symptoms is the first step to correcting them. Boron deficiency often causes blossom end rot in fruits, whereas manganese deficiency leads to interveinal chlorosis on young leaves. By monitoring crops for these signs, growers can apply targeted Micronutrients in Agriculture to restore balance before yield losses occur.
Recommended Products: CK NPK Complex Fertilizers
Soil Testing and Foliar Analysis
To manage Micronutrients in Agriculture effectively, regular soil and tissue tests are essential. Soil tests reveal total available levels, while foliar analysis indicates what the plant actually absorbs.
With this data, agronomists can recommend precise micronutrient blends—whether through soil incorporation or foliar sprays—to address specific crop needs.
Methods of Micronutrient Application
Micronutrients can be applied via granular fertilizers, chelated forms, or foliar sprays. Chelated micronutrients often exhibit better availability in challenging pH conditions.
Foliar application offers rapid correction of deficiencies and is particularly useful during critical growth stages. Choosing the right delivery method ensures that Micronutrients in Agriculture reach the plant when and where they’re needed most.
Benefits of Balanced Micronutrient Management
Proper use of Micronutrients in Agriculture enhances root development, improves stress resistance (drought, heat, or disease), and increases nutrient use efficiency.
Balanced micronutrient levels also contribute to higher protein content and better-quality produce, meeting both yield and nutritional goals for modern farming operations.
Recommended Products: Unique Fertilizers
Integrating Micronutrients into Nutrient Programs
An effective fertilizer program considers both macro- and micronutrients. Integrating Micronutrients in Agriculture into regular fertilization schedules helps prevent hidden hunger—where plants look healthy but suffer subclinical deficiencies.
Split applications and blending micronutrient carriers with macronutrient fertilizers simplify logistics and ensure uniform dispersion.
Sustainability and Environmental Impact
Using Micronutrients in Agriculture judiciously minimizes environmental runoff and leaching compared to over-application of macronutrients.
Targeted micronutrient management supports sustainable agriculture by reducing waste, lowering input costs, and protecting surrounding ecosystems from nutrient pollution.
Advances in Micronutrient Delivery Technologies
Recent innovations such as nano‑encapsulation and controlled‑release coatings have improved the efficiency of Micronutrients in Agriculture. These technologies ensure a steady supply of trace elements over time, reduce leaching losses, and allow for lower application rates.
Economic Benefits of Micronutrient Management
Investing in targeted micronutrient programs often yields a high return. By preventing yield losses and improving crop quality, farmers can increase marketable output and reduce the need for corrective treatments, making micronutrient applications cost‑effective in the long run.
Challenges and Future Outlook
Despite clear advantages, widespread adoption of micronutrient programs faces barriers such as lack of awareness, testing infrastructure, and upfront costs.
Ongoing research and extension services are critical to overcome these challenges and promote best practices in Micronutrients in Agriculture.
For further reading, check out:
Conclusion
Optimizing micronutrient use completes a comprehensive fertility program. By leveraging modern delivery methods, understanding economic returns, and addressing adoption hurdles, growers can maximize both yield and sustainability.
A strategic focus on these tiny but vital elements ensures healthier crops and more resilient agricultural systems.
FAQs
1. How often should I test for micronutrient deficiencies?
Annual soil and tissue tests—ideally before each planting season—help you detect and correct imbalances early.
2. What’s the fastest way to correct a micronutrient deficiency?
Foliar sprays of chelated nutrients provide rapid uptake, while soil‑applied granular or liquid formulations offer longer‑term correction.
3. Can I apply micronutrients with my regular N–P–K fertilizer?
Yes—blending micronutrient carriers into your standard fertilizer or using combined N–P–K‑micronutrient mixes simplifies application and ensures uniform distribution.
Selecting the Right Fertilizer for Crops is crucial for maximizing yield, improving soil health, and ensuring sustainable farming. With so many products on the market—from granular blends to liquid solutions—knowing how to match fertilizer to your specific crop needs can make all the difference.
Key Steps to Choosing the Right Fertilizer
1. Start with a Soil Test
Before investing in any fertilizer, perform a comprehensive soil test. A professional analysis reveals existing nutrient levels and pH, guiding you toward the Right Fertilizer for Crops by identifying deficiencies in nitrogen, phosphorus, potassium, or secondary nutrients.
2. Match N–P–K Ratios to Crop Demands
Different crops require distinct balance of primary nutrients:
- Leafy greens favor high nitrogen formulations.
- Root vegetables benefit from extra phosphorus.
- Fruiting crops need ample potassium.
By understanding your crop’s lifecycle, you can select the Right Fertilizer for Crops with an N–P–K ratio tailored to each growth stage.
Recommended Products: CK NPK Complex Fertilizers
3. Choose Between Organic and Synthetic Options
Organic fertilizers (compost, manure, bone meal) release nutrients slowly and improve soil texture. Synthetic products deliver precise nutrient levels quickly. The Right Fertilizer for Crops often combines both: immediate nutrient boost from synthetics and long-term soil health from organic amendments.
4. Consider Application Method and Timing
Granular fertilizers work best when incorporated into soil before planting, while foliar sprays or liquid feeds can correct deficiencies mid-season. Applying the Right Fertilizer for Crops at the optimal time—such as pre-planting and key growth stages—ensures efficient nutrient uptake and minimizes waste.
5. Factor in Environmental and Economic Concerns
Efficient use of the Right Fertilizer for Crops means preventing runoff and reducing input costs. Split applications, slow-release formulations, and buffer strips around waterways all contribute to sustainable fertilization practices that protect both your budget and the environment.
6. Read and Interpret Fertilizer Labels
Fertilizer packages list nutrient percentages and secondary ingredients. Learn to decode the N–P–K numbers, plus calcium, magnesium, sulfur, and trace elements. Understanding these labels ensures you pick the Right Fertilizer for Crops that fills specific nutrient gaps without overloading your soil.
Recommended Products: Unique Fertilizers
7. Include Micronutrients When Needed
Beyond nitrogen, phosphorus, and potassium, crops sometimes require micronutrients like zinc, iron, manganese, and boron. A tissue analysis or visual deficiency symptoms (e.g., interveinal chlorosis) can signal micronutrient needs. Adding a targeted foliar spray or granular mix helps deliver these essential elements.
8. Adjust for Soil pH and Texture
Soil pH affects nutrient availability—acidic soils can lock up phosphorus, while alkaline soils may limit iron uptake. Similarly, sandy soils leach nutrients faster than clay. Test your soil’s pH and texture, then choose the Right Fertilizer for Crops with pH‑adjusting amendments (lime or sulfur) and the appropriate release rate for your soil type.
9. Monitor Crop Response and Refine Your Plan
After applying fertilizer, regularly inspect plant vigor, leaf color, and yield. Keep records of application rates, timing, and weather conditions. If you notice stunted growth or discoloration, revisit your soil tests and tweak your selection or schedule—continual monitoring ensures you maintain the Right Fertilizer for Crops tailored to evolving field conditions.
For further reading, check out:
Conclusion
Choosing the Right Fertilizer for Crops involves understanding your soil, matching nutrient ratios to crop needs, and balancing organic with synthetic sources. By following these guidelines, you’ll promote vigorous growth, higher yields, and healthier soils season after season.
FAQs
1. How often should I test my soil?
Ideally every 1–2 years to track nutrient levels and adjust your Right Fertilizer for Crops plan.
2. Can I use one fertilizer for all my crops?
Not recommended. Different crops have unique N–P–K needs, so choose the Right Fertilizer for Crops based on each crop’s requirements.
3. What’s the best way to apply fertilizer?
In split applications—pre‑planting and at key growth stages—using granular incorporation or foliar sprays for the Right Fertilizer for Crops uptake.
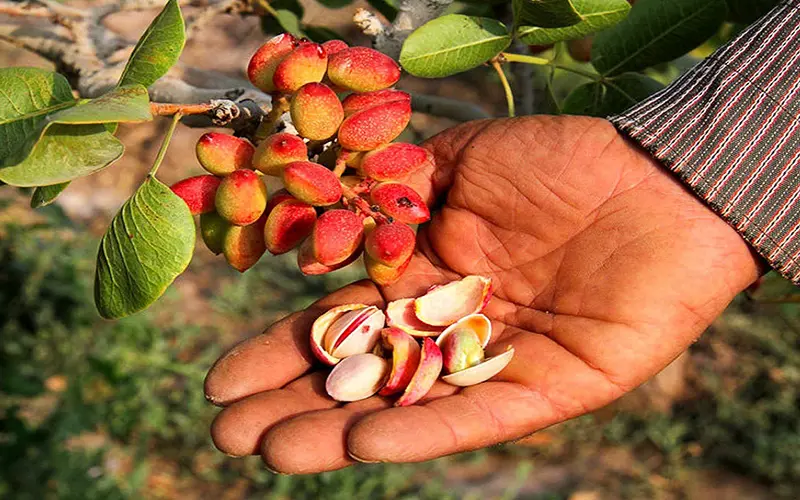
Proper Fertilizer for Pistachio Trees ensures healthy growth, strong nut production, and long-lived trees. A well-timed nutrient plan addresses seasonal demands and prevents deficiencies that can stunt growth or reduce yields.
Why Use Fertilizer for Pistachio Trees?
Pistachio trees have high nutrient requirements once established. Applying Fertilizer for Pistachio Trees:
- Replenishes soil nutrients depleted by heavy nut production
- Encourages robust vegetative growth for supports and branches
- Improves nut quality by ensuring adequate nitrogen, phosphorus, and potassium
Nutrient Requirements
Primary Nutrients
- Nitrogen (N): Drives leaf and shoot growth
- Phosphorus (P): Supports root development and flowering
- Potassium (K): Boosts fruit size, shell integrity, and drought tolerance
When choosing Fertilizer for Pistachio Trees, look for an N–P–K ratio tailored to your orchard’s soil test results (common: 10-10-10 or 16-16-16).
Recommended Products: CK NPK Complex Fertilizers
Secondary Nutrients & Micronutrients
- Calcium & Magnesium: Strengthen cell walls
- Zinc & Iron: Prevent chlorosis and maintain green foliage
A balanced formulation or occasional foliar feed can supply these in small but critical amounts.
Seasonal Fertilizer Schedule
Planning Fertilizer for Pistachio Trees seasonally aligns nutrients with growth stages:
Early Spring (Bud Break)
- Apply nitrogen-rich fertilizer to fuel new shoot growth
- Broadcast ½ to 1 lb of actual N per tree, based on age
Recommended Products: Unique Fertilizers
Late Spring (Pre-Flowering)
- Side-dress with balanced N–P–K to promote bloom set
- Ensure soil moisture to help nutrient uptake
Summer (Nut Development)
- Light application of nitrogen to support filling
- Avoid excessive phosphorus, which can inhibit N uptake
Fall (Post-Harvest)
- Apply a balanced fertilizer to replenish what was removed in the crop
- Incorporate organic matter or compost to improve soil structure
Yearly Plan for Fertilizer for Pistachio Trees
A yearly cycle ensures consistency:
- Winter Soil Test: Adjust ratios for spring applications
- Spring Feeding: Nitrogen boost at bud break
- Mid-Year Check: Correct any emerging deficiencies
- Fall Replenishment: Prepare trees for dormancy
A well-timed Fertilizer for Pistachio Trees program prevents over- or under-feeding.
Recommended Products: CK R142-10-20-30 micros pistacho
Application Tips
- Water In Well: Always irrigate after granular applications.
- Avoid Leaf Burn: Keep granular fertilizer away from the trunk flare.
- Split Applications: Multiple smaller doses are better than one large dose.
- Monitor Tree Health: Yellowing leaves or stunted growth signal adjustment needs.
Organic vs. Synthetic Fertilizer Options
When selecting Fertilizer for Pistachio Trees, you can choose between organic materials (like composted manure or bone meal) and synthetic blends. Organic options release nutrients more slowly, improve soil structure, and support microbial life, while synthetic fertilizers provide precise N–P–K ratios for quick uptake. A mixed approach often offers both immediate nourishment and long‑term soil health.
Identifying and Correcting Nutrient Deficiencies
Regularly scout your orchard for signs of nutrient stress—yellowing leaves (nitrogen deficiency), stunted flowering (phosphorus lack), or leaf scorch (potassium shortfall). Once a deficiency is confirmed by soil or tissue testing, tailor your Fertilizer for Pistachio Trees application to correct the imbalance, using targeted foliar feeds or soil amendments as needed.
Environmental Considerations and Sustainable Practices
Over‑application of Fertilizer for Pistachio Trees can lead to nutrient runoff and groundwater contamination. To minimize impact, employ split applications, use cover crops in off‑seasons to capture excess nutrients, and maintain buffer zones near water sources. Integrating these practices ensures high yields while protecting the surrounding ecosystem.
For further reading, check out:
Conclusion
Implementing a consistent Fertilizer for Pistachio Trees schedule tailored to seasonal growth stages maximizes yield and tree health. By understanding your soil’s needs, following a spring-to-fall plan, and fine-tuning with soil tests, you’ll ensure your pistachio orchard thrives with the right Fertilizer for Pistachio Trees year after year.
FAQs
1. When is the best time to apply fertilizer for pistachio trees?
Early spring at bud break and again in late spring before flowering are ideal. A light summer top‑dress and a post‑harvest fall application complete the annual cycle.
2. How much fertilizer for pistachio trees should I use per application?
Aim for ½ to 1 lb of actual nitrogen per tree in spring, adjusted by tree age and soil test. Split that into two or three smaller doses rather than one large feeding.
3. What are signs I’m over‑ or under‑fertilizing my pistachios?
Yellowing or sparse foliage often indicates under‑feeding, while excessive vegetative growth with poor nut set suggests over‑fertilization. Regular soil tests help keep your fertilizer levels balanced.
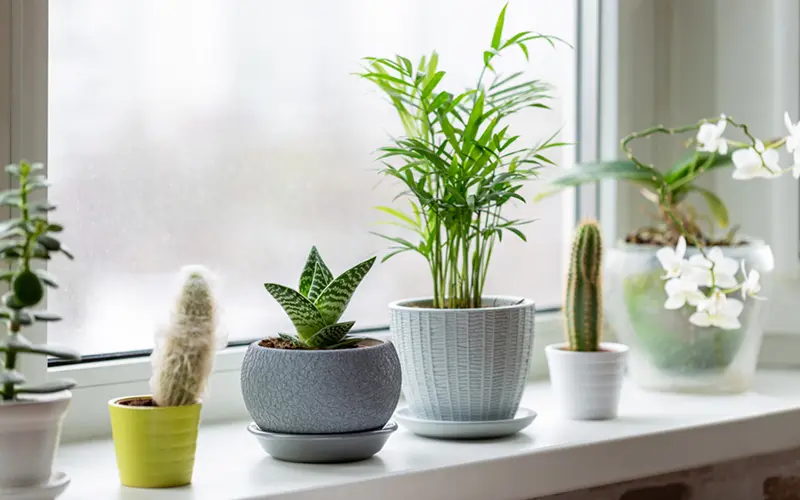
Houseplants add beauty and freshness to any indoor space, but to keep them thriving, proper nutrition is essential. Just like outdoor plants, indoor plants require the right balance of nutrients to grow strong, produce vibrant leaves, and resist diseases.
Choosing the best fertilizer for your houseplants can make all the difference in their overall health and longevity. In this guide, we’ll explore the best fertilizers for houseplants, how to apply them, and tips to ensure your plants get the nourishment they need.
Understanding Houseplant Nutrients
Fertilizers provide essential nutrients that plants need to grow. The three primary nutrients, known as macronutrients, are:
- Nitrogen (N) – Promotes leafy growth and overall greenery.
- Phosphorus (P) – Supports strong roots and flower development.
- Potassium (K) – Enhances plant health and disease resistance.
Besides these, micronutrients like calcium, magnesium, and iron also play a vital role in plant development.
Recommended Products: CK NPK Complex Fertilizers
Types of Fertilizers for Houseplants
There are different types of fertilizers available, each with its own benefits:
Liquid Fertilizers :
Quick-acting and easy to apply, liquid fertilizers are mixed with water and used during regular watering. They provide an instant boost to plants.
Slow-Release Fertilizers
These fertilizers come in granules or pellets that break down gradually over time, providing nutrients consistently.
Organic Fertilizers
Made from natural ingredients like compost, seaweed, or worm castings, these fertilizers improve soil health while nourishing plants.
Recommended Products: Unique Fertilizers
Synthetic Fertilizers
Chemically formulated, synthetic fertilizers provide precise nutrient amounts and are often highly effective for rapid plant growth.
Recommended Products:
How to Apply Fertilizer to Houseplants
Proper application is key to ensuring houseplants benefit from fertilizers:
Frequency
Most houseplants should be fertilized every 2–4 weeks during their active growing season (spring and summer) and less frequently in fall and winter.
Dilution
Always follow the instructions on the fertilizer package to avoid over-fertilization, which can burn plant roots.
Application Method
Apply liquid fertilizers during regular watering, while granular fertilizers should be sprinkled on top of the soil and lightly mixed in.
Common Mistakes to Avoid
Over-Fertilizing
Too much fertilizer can lead to salt buildup in the soil, causing root damage.
Under-Fertilizing
Without enough nutrients, plants may become weak and have slow growth.
Using the Wrong Type
Different plants have different nutrient needs. Research your specific plant’s requirements before selecting a fertilizer.
For further reading, check out: best fertilizer for tomatoes
Conclusion
Fertilizing your houseplants correctly can significantly impact their health and appearance. By understanding the types of fertilizers available and following proper application methods, you can ensure your indoor plants remain lush, green, and vibrant all year round. Remember, the key to successful fertilization is balance—providing the right nutrients in the right amounts at the right time.
FAQs
1. How often should I fertilize my houseplants?
Most houseplants should be fertilized every 2–4 weeks during the growing season (spring and summer). In fall and winter, reduce the frequency as plants enter dormancy.
2. Can I use outdoor plant fertilizer for indoor plants?
While some outdoor fertilizers can be used for houseplants, they may be too strong or have different nutrient compositions. It’s best to use fertilizers specifically formulated for indoor plants.
3. What are signs that my houseplant needs fertilizer?
If your plant has slow growth, pale or yellowing leaves, or weak stems, it may be lacking essential nutrients. Regular fertilization can help restore its health and vitality.
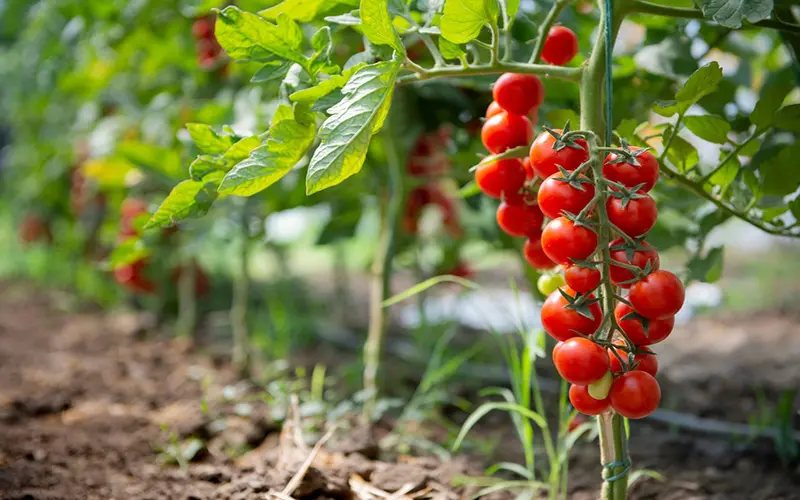
Tomatoes are one of the most popular and rewarding crops to grow in home gardens. Whether you are a seasoned gardener or a beginner, achieving the best tomato yield requires attention to various factors, including soil health, watering, and, most importantly, the right type of fertilizer.
Fertilizing your tomato plants properly ensures they have the nutrients needed for optimal growth, robust fruit production, and resistance to diseases.
But with so many fertilizers available, choosing the right one can be a bit overwhelming. In this article, we will discuss the best fertilizers for tomatoes, their benefits, and how to apply them.
Types of Fertilizers for Tomatoes
Tomatoes require three primary nutrients: nitrogen (N), phosphorus (P), and potassium (K). These are the macronutrients that fuel healthy plant growth. A balanced fertilizer, often labeled with an N-P-K ratio, can provide these essential nutrients. However, tomatoes also benefit from micronutrients like calcium, magnesium, and sulfur, which help prevent specific issues like blossom end rot and enhance fruit flavor.
Recommended Products: CK NPK Complex Fertilizers
1. Organic Fertilizers
Organic fertilizers are derived from natural sources such as compost, manure, or bone meal. These fertilizers slowly release nutrients into the soil, promoting long-term soil health. They are ideal for gardeners looking to grow healthy, chemical-free tomatoes. Some of the best organic fertilizers for tomatoes include:
Compost:
Rich in nutrients and microorganisms, compost improves soil structure and fertility.
Fish emulsion:
A high-nitrogen organic fertilizer that encourages leafy growth.
Bone meal:
High in phosphorus, which supports root development and flowering.
2. Synthetic Fertilizers
Synthetic fertilizers, often in granular or liquid form, provide a quick and concentrated source of nutrients for tomatoes. These fertilizers are typically more affordable and easier to apply than organic options. The N-P-K ratio for tomatoes is often in the range of 10-10-10, 5-10-10, or 3-4-6. Some of the best synthetic fertilizers for tomatoes include:
Miracle-Gro Water Soluble Tomato Plant Food:
This fertilizer is specially formulated for tomatoes and provides balanced nutrients for vigorous growth.
Jobe’s Organic Tomato and Vegetable Fertilizer:
A slow-release, organic option that delivers a balanced mix of nutrients.
3. Slow-Release Fertilizers
Slow-release fertilizers are designed to release nutrients over an extended period. They are ideal for tomatoes as they provide consistent nourishment throughout the growing season. These fertilizers are easy to use and reduce the frequency of applications. Some well-known slow-release fertilizers include:
Osmocote Smart-Release Flower & Vegetable Plant Food:
A well-balanced formula that ensures tomatoes receive steady nutrients.
How to Apply Fertilizer for Tomatoes
To get the best results from your tomato fertilizer, timing and application methods matter. Here are some tips:
Pre-planting: Before planting your tomatoes, mix a slow-release fertilizer or compost into the soil to enrich it.
During Growth:
Apply a balanced fertilizer about every 3-4 weeks during the growing season. Liquid fertilizers can be applied more frequently, but follow the instructions on the label.
Blossom End Rot Prevention:
If you notice black spots at the bottom of your tomatoes, it may be due to a calcium deficiency. Adding a calcium-rich fertilizer or crushed eggshells to the soil can help prevent this condition.
For further reading, check out : Affordable Fertilizers for Small Farms
Conclusion
Choosing the best fertilizer for tomatoes depends on your gardening goals, whether you prefer organic or synthetic options, and your specific soil needs.
Both organic and synthetic fertilizers can work well, but organic options may provide longer-term benefits for soil health.
It’s essential to feed your tomatoes with the right nutrients at the right time to maximize yield and produce the healthiest fruits possible.
FAQs
1. How often should I fertilize my tomato plants?
It is recommended to fertilize tomatoes every 3-4 weeks during the growing season. If using a slow-release fertilizer, it may only need to be applied once or twice per season. For liquid fertilizers, follow the label instructions for frequency.
2. Can I use too much fertilizer on my tomatoes?
Yes, over-fertilizing can harm your tomatoes, leading to excessive foliage growth at the expense of fruit production. It can also cause nutrient imbalances in the soil. Always follow the recommended dosage and avoid applying too frequently.
3. What are the signs of nutrient deficiencies in tomato plants?
Common signs include yellowing leaves (nitrogen deficiency), poor root development (phosphorus deficiency), and brown, sunken spots on the bottom of fruits (calcium deficiency). Adjusting the fertilizer or adding specific nutrients can correct these issues.